


I saw something similar to this on Pinterest a while back, and thought I would create my own version to give as Christmas presents to all the little kids in my family. I named the ones I made for my boys (who are 3 & 5) ‘Mousie Tousie’ and ‘Jim Marvin’, after their Dad’s imaginary friends from childhood. I’m actually surprised at how much they love them, since usually they are unimpressed by anything that doesn’t light up, make noise, or otherwise run on batteries. My niece & nephew (1 and 4) haven’t had much exposure to electronics or high-tech toys, so I wasn’t as surprised that they liked them – but I was super excited at just how much they liked them. All the kids carried them around for the entire day, and my boys snuggled up in bed with them that night. Which, of course, made my heart melt.
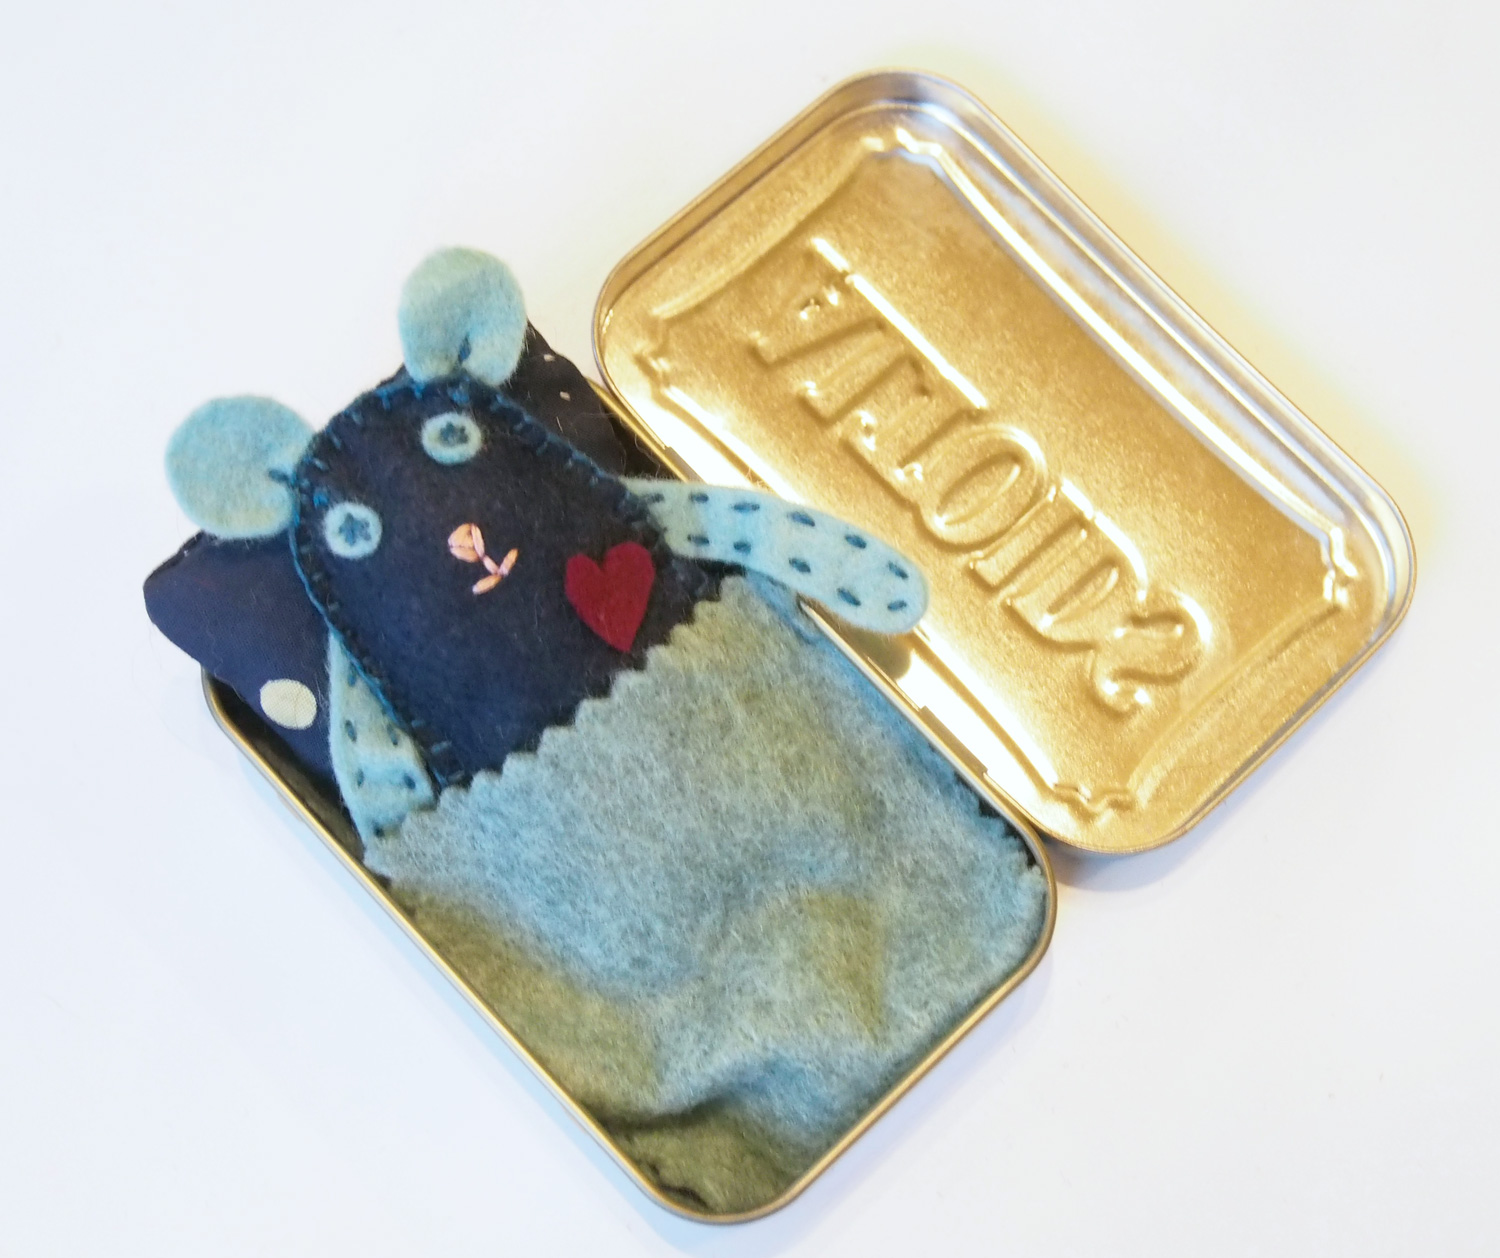
Since Valentine’s Day is coming up, I thought it would be fun to create a “Valentine’s Day” version of this cute little mousie. It would make such a cute little gift to leave on your kiddo’s pillow for them to find in the morning, or to send to school for them to discover in their lunchbox! When the boys saw me making this today they both insisted that I add a ♥ to theirs too. Jack has also requested that I use an empty tissue box that he saved to make his mousie a house. So, I guess I have another mouse-related project to work on tomorrow 😉


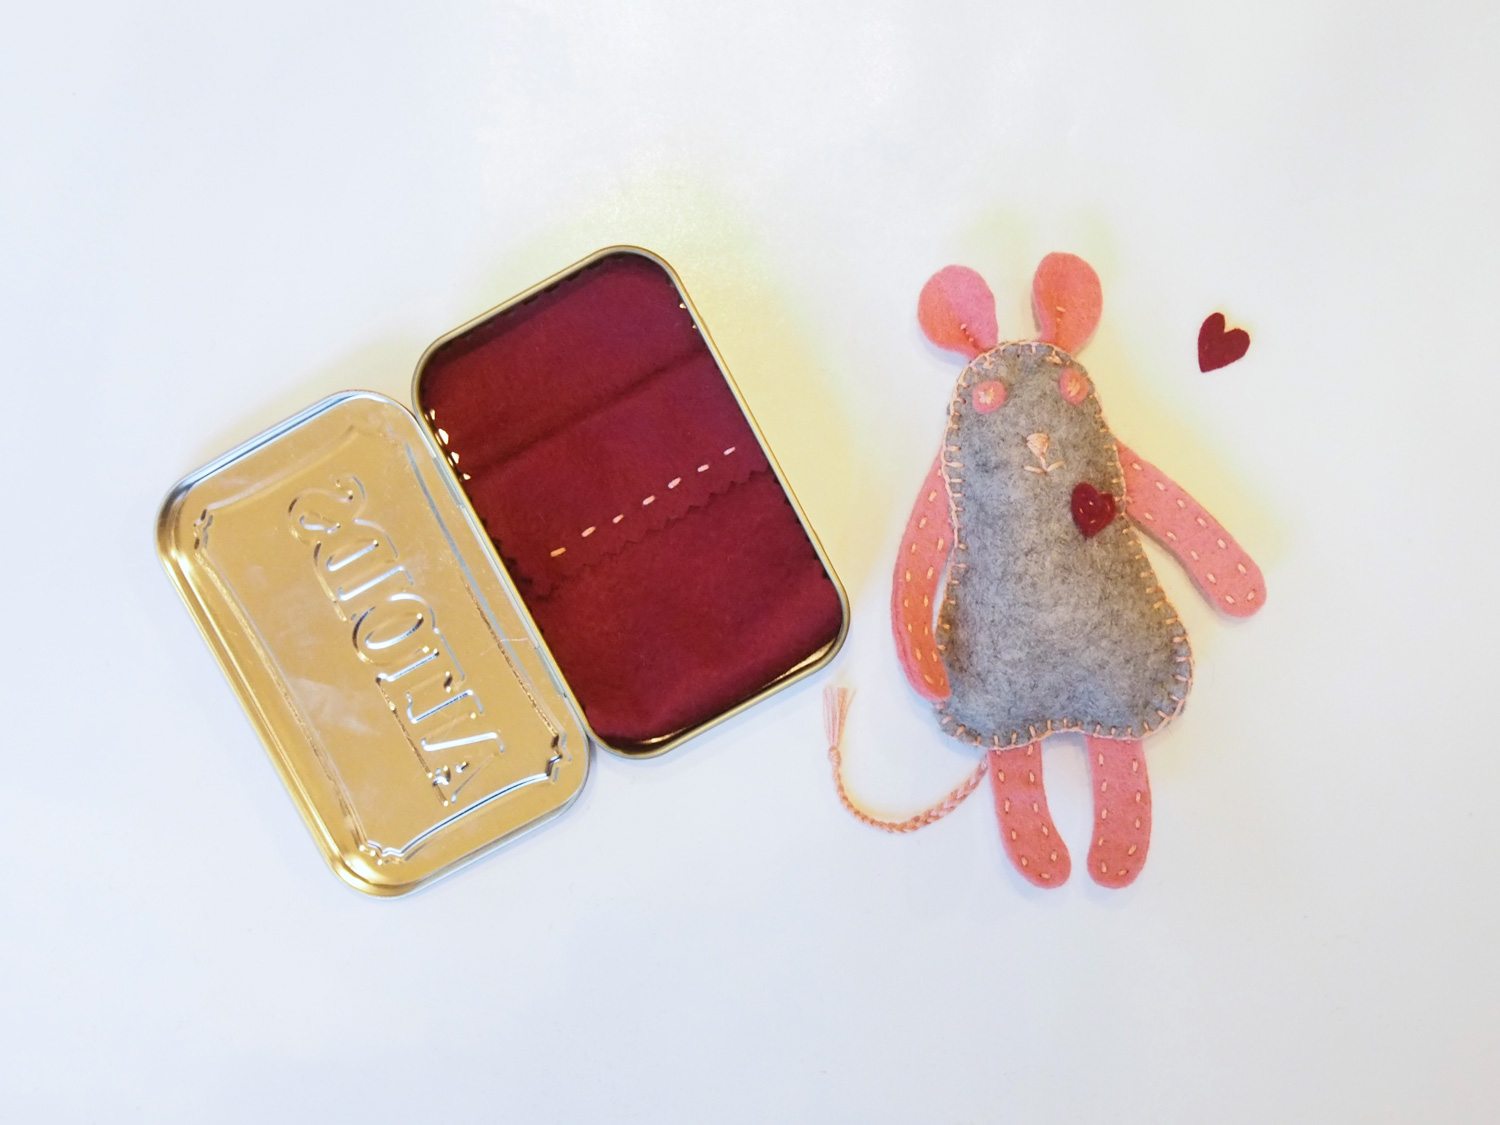
If I had planned ahead (yeah right) I would have been saving Altoids tins so that I didn’t have to buy 6 of them for this project! Instead, I found them for the lowest price I could (about $1 each at my local Fred Meyer), and emptied the mints into a tupperware container. This way they won’t go to waste since I can keep refilling my box from this stash. I bought mostly wintergreen since it’s my favorite flavor, however, I did buy one package of cinnamon, and it made the mouse smell so good! I highly recommend cinnamon Altoids if you’re buying them just for this project. All the kids loved the smell of the mouse with the cinnamon-scented bed, and kept arguing over who got to play with it. Besides, the dark red color is pretty, and perfect for Valentine’s Day.

Materials:
- Altoids (or other similar) tin
- Felt – I used scraps that I had in my fabric stash, but two 9″x12″ sheets (main color & accent color) will be more than enough to make a mouse and blanket.
- Embroidery floss in a complementary color.
- Polyester fill (stuffing)
- Needle
- Scissors
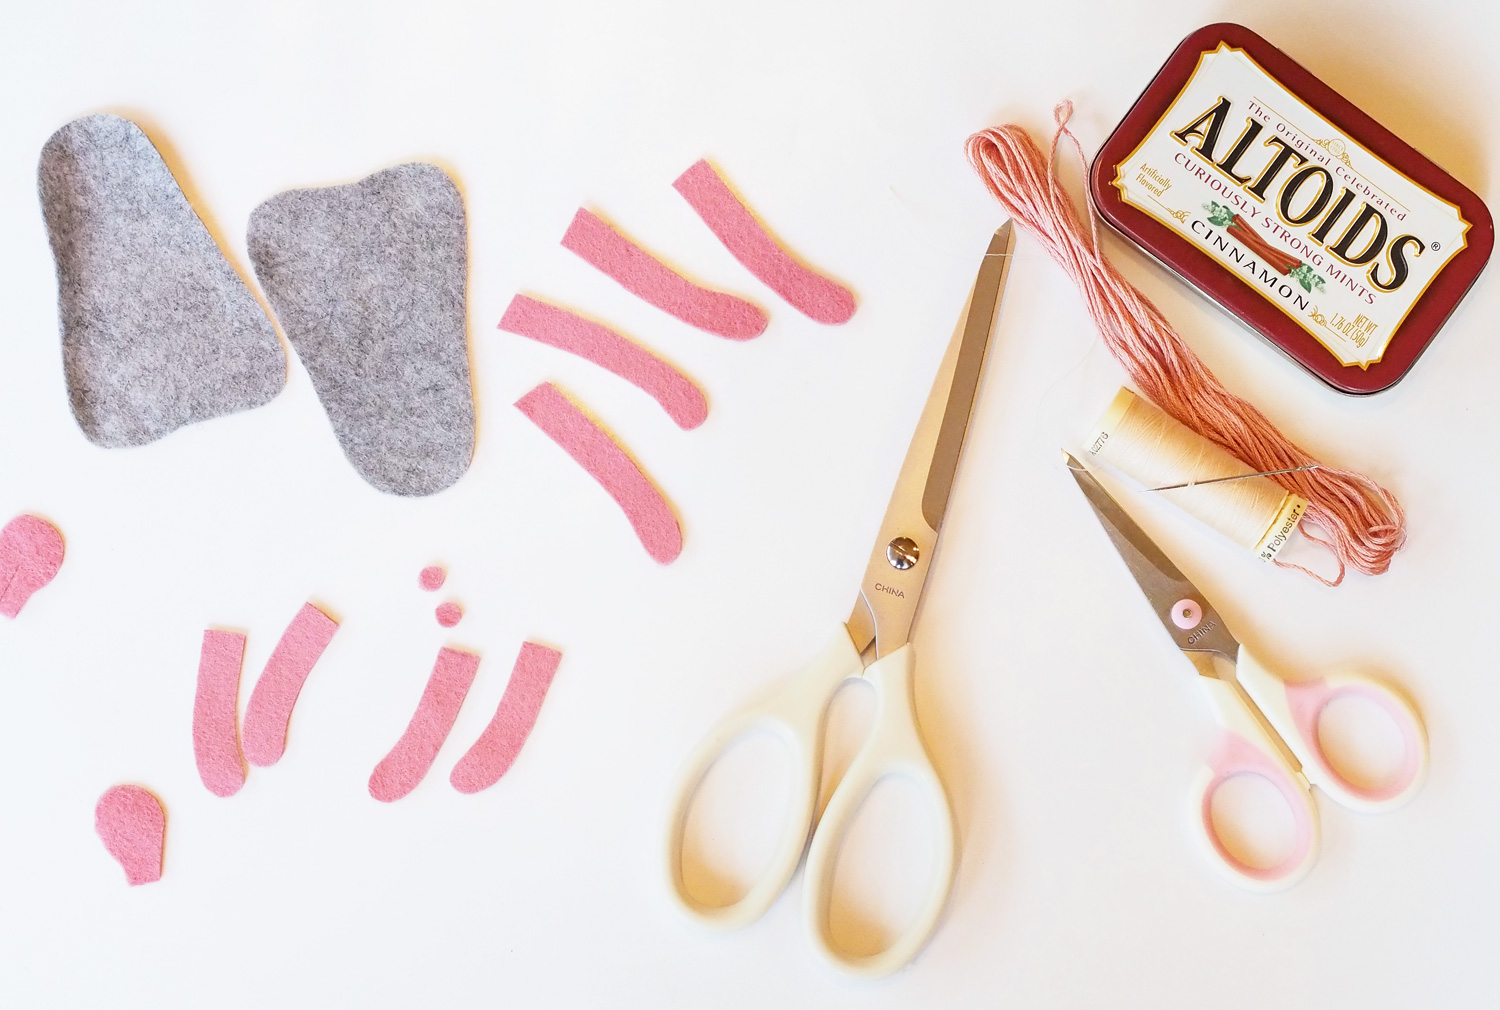
Step 1 – Print template on 8.5″x11″ paper and cut out the pieces. Trace the pieces onto the fabric using a pencil or fine-tip fabric marker. Cut out felt pieces. Match up the body, arm, and leg pieces back to back, and even up the edges with a scissors if necessary.
Step 2 – Using 3 strands of embroidery floss (it comes in 6 strands, so you have to split it in half), stitch around the edges of the arms and legs with a running stitch. Remember that the stitches will be visible on both the front and the back of each piece, so keep your stitches neat in the back too. Hide your knots between the layers.
Step 3 – Sew on the eyes. I used an * pattern, but you can use whatever stitch style you think looks best.
Step 4 – Sew a little triangle for the nose and mouth.
Step 5 – Cut a slit half-way up the middle of each ear. Pinch the bottom of the ear pieces together and stitch them in place.

Step 6 – Anchor 3 pieces of embroidery floss (don’t separate these pieces, use all 6 strands) at the back of the body, near the bottom. Braid them to the desired tail length. Tie in a knot. Trim the ends so that they’re even. Stitch a little X at the top of the tail.

** This is when you should add the heart, affixing it to the front of the body with a running stitch. I forgot to do it, so I had to add it at the end (which is more difficult because you can’t hide your knots as easily).
Step 7 – Using a blanket stitch, sew the body pieces together starting at the bottom left side. Hide your knots in between the layers. If you’re not familiar with this stitch, there is a great tutorial here: Blanket Stitch, as well as instructions for tons of other embroidery stitches.


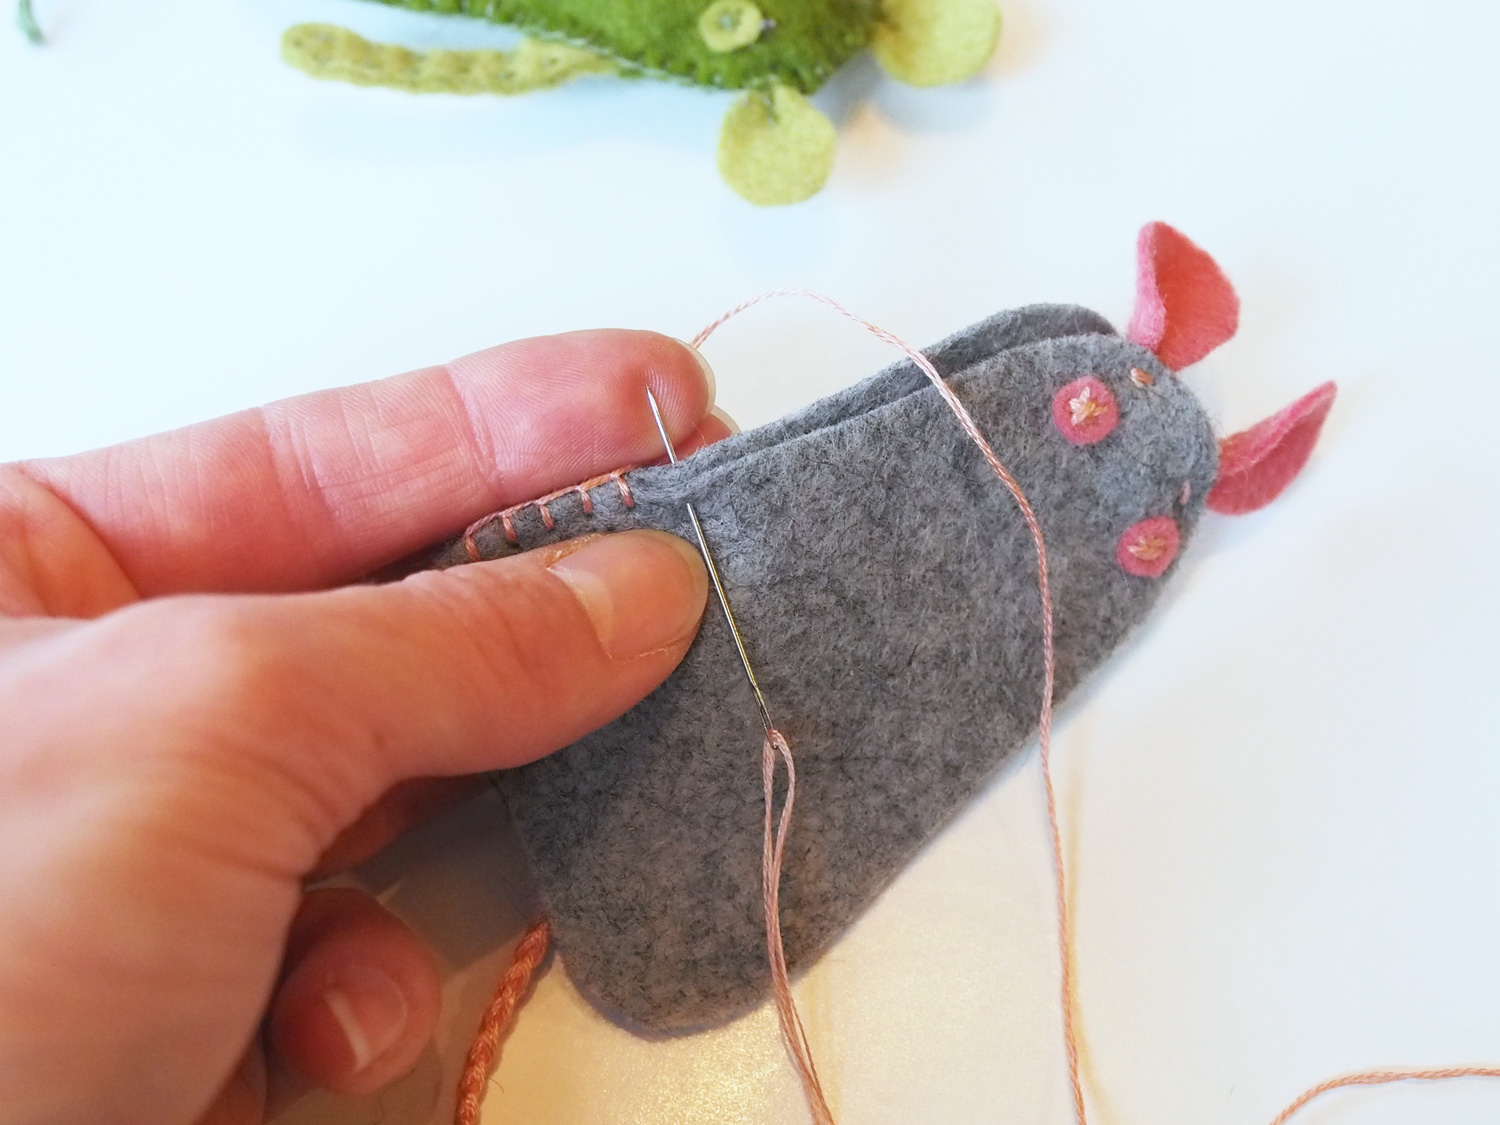
Step 8 – Stop when you get half-way up the side and insert the arm. Continue to stitch around the edges, anchoring the arm in place as you go.

Step 9 – Continue sewing around the edges of the body, fixing the other arm in place as you go. Stop when you get to the bottom.
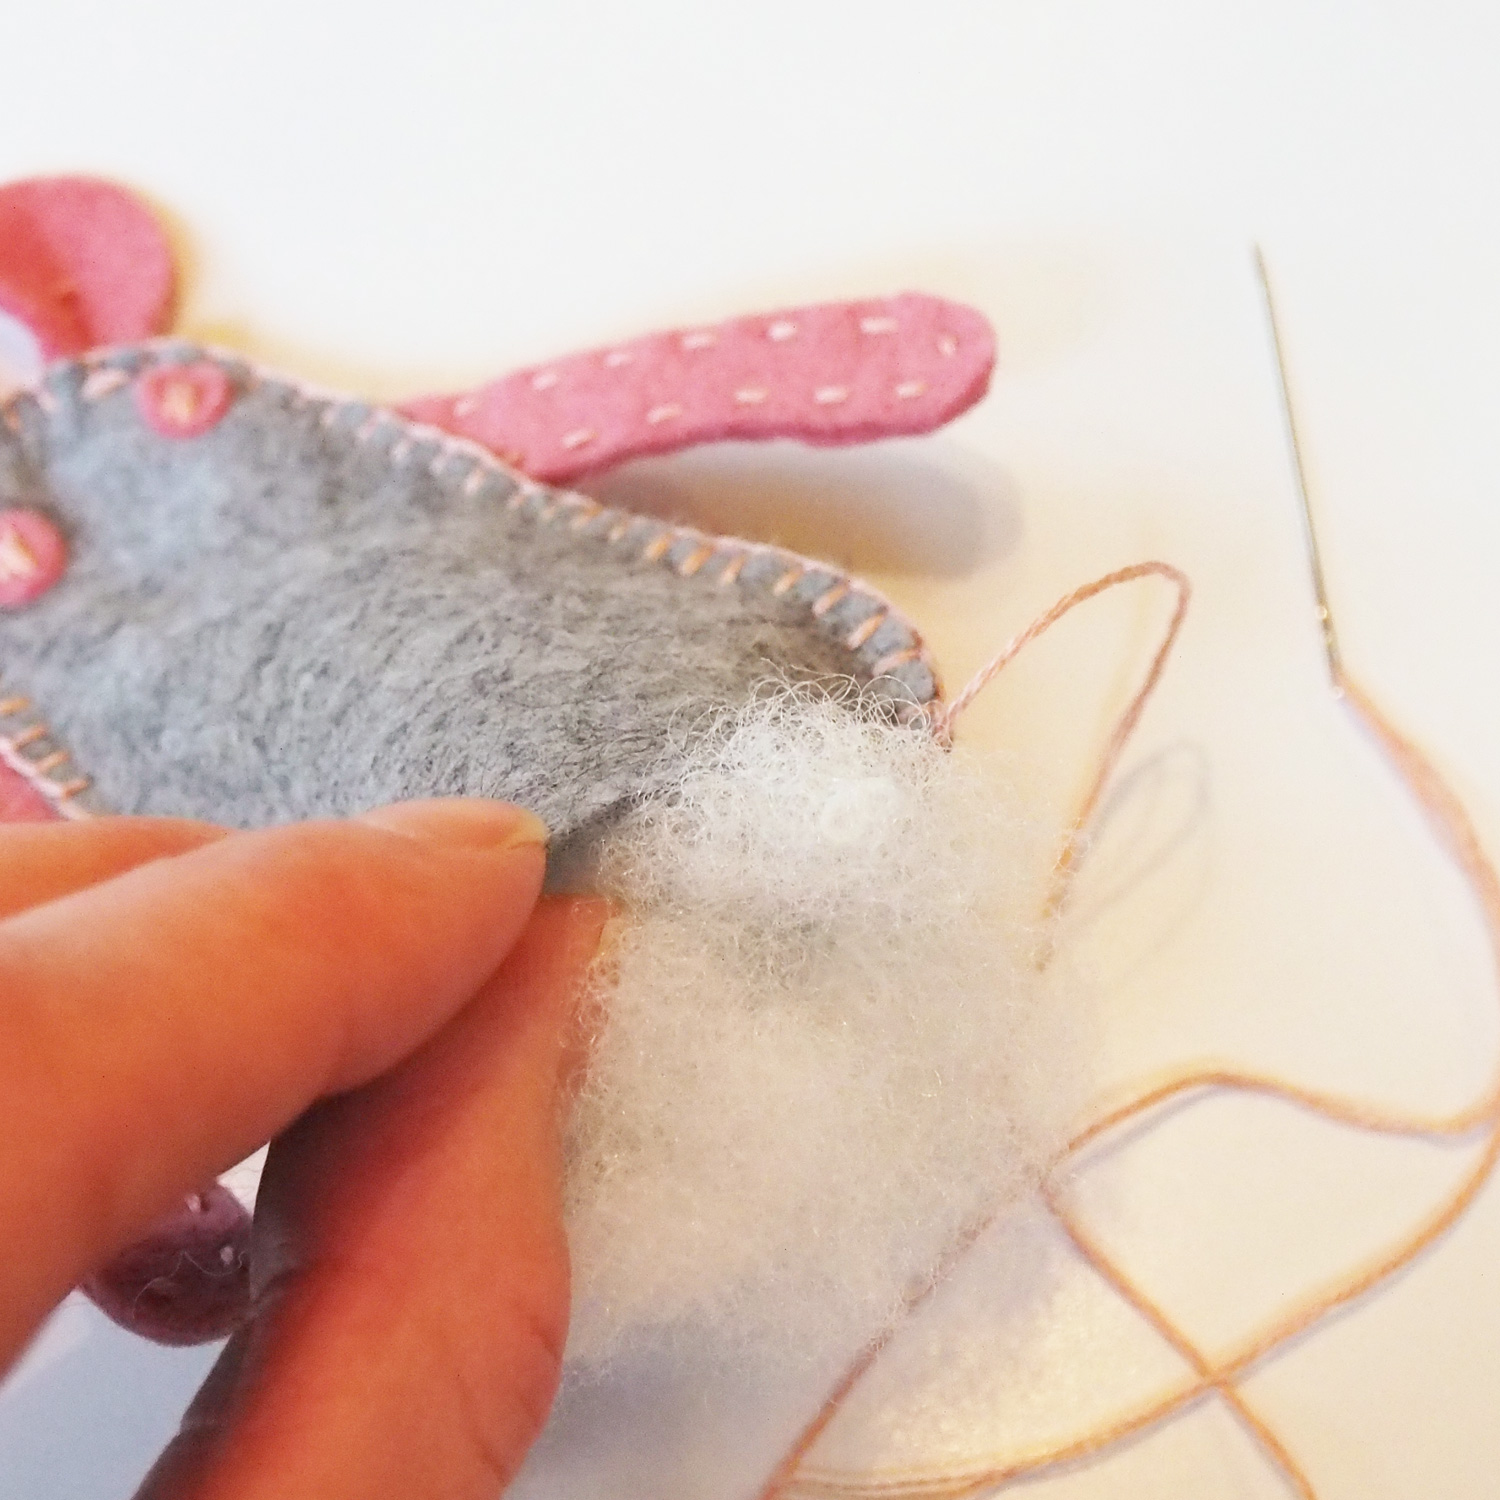
Step 10 – Insert stuffing into the body of the mouse. Be careful not to ‘over-stuff’, just a little bit is all you need.

Step 11 – Finish stitching around the bottom edge. Don’t forget to sew the legs in place as you go. That’s it – the mouse is finished! Now on to the blanket.
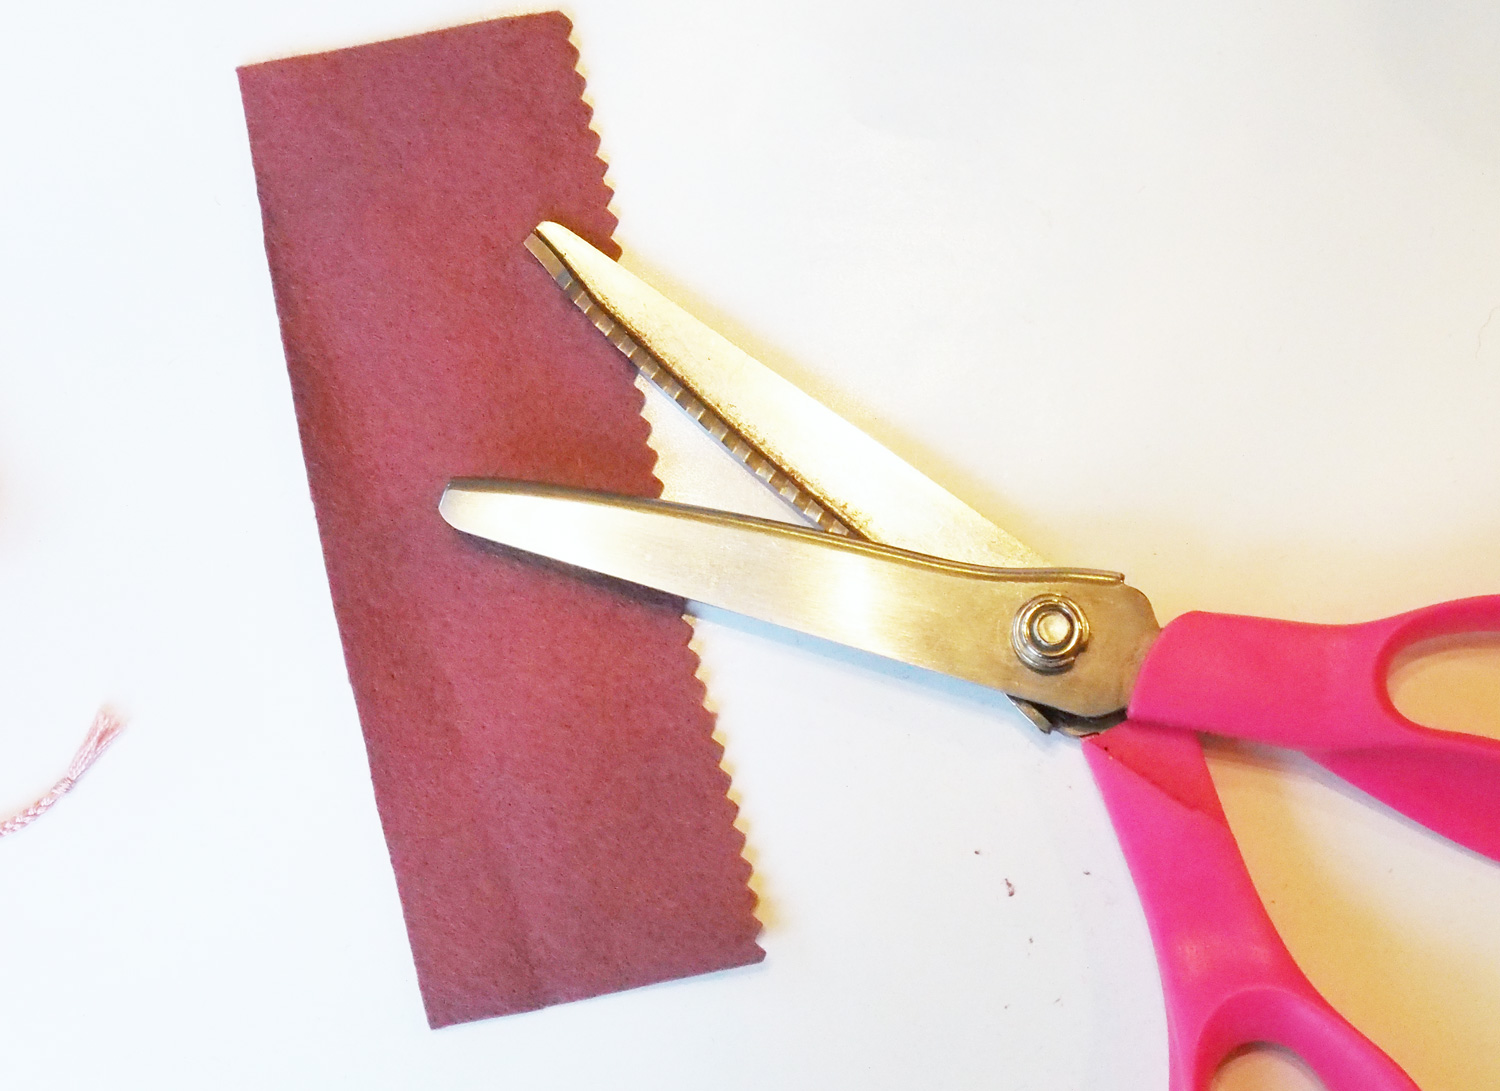
Step 12 – Cut a piece of felt as wide as the Altoids tin and 1 1/2 times as long. Use a pinking shears if desired. If you want to, you can fold over the top edge of the blanket and stitch it in place.
This is Jim Marvin, the mousie that I made for Jack. Notice the little pillow that I made from some scraps of fabric I had laying around.

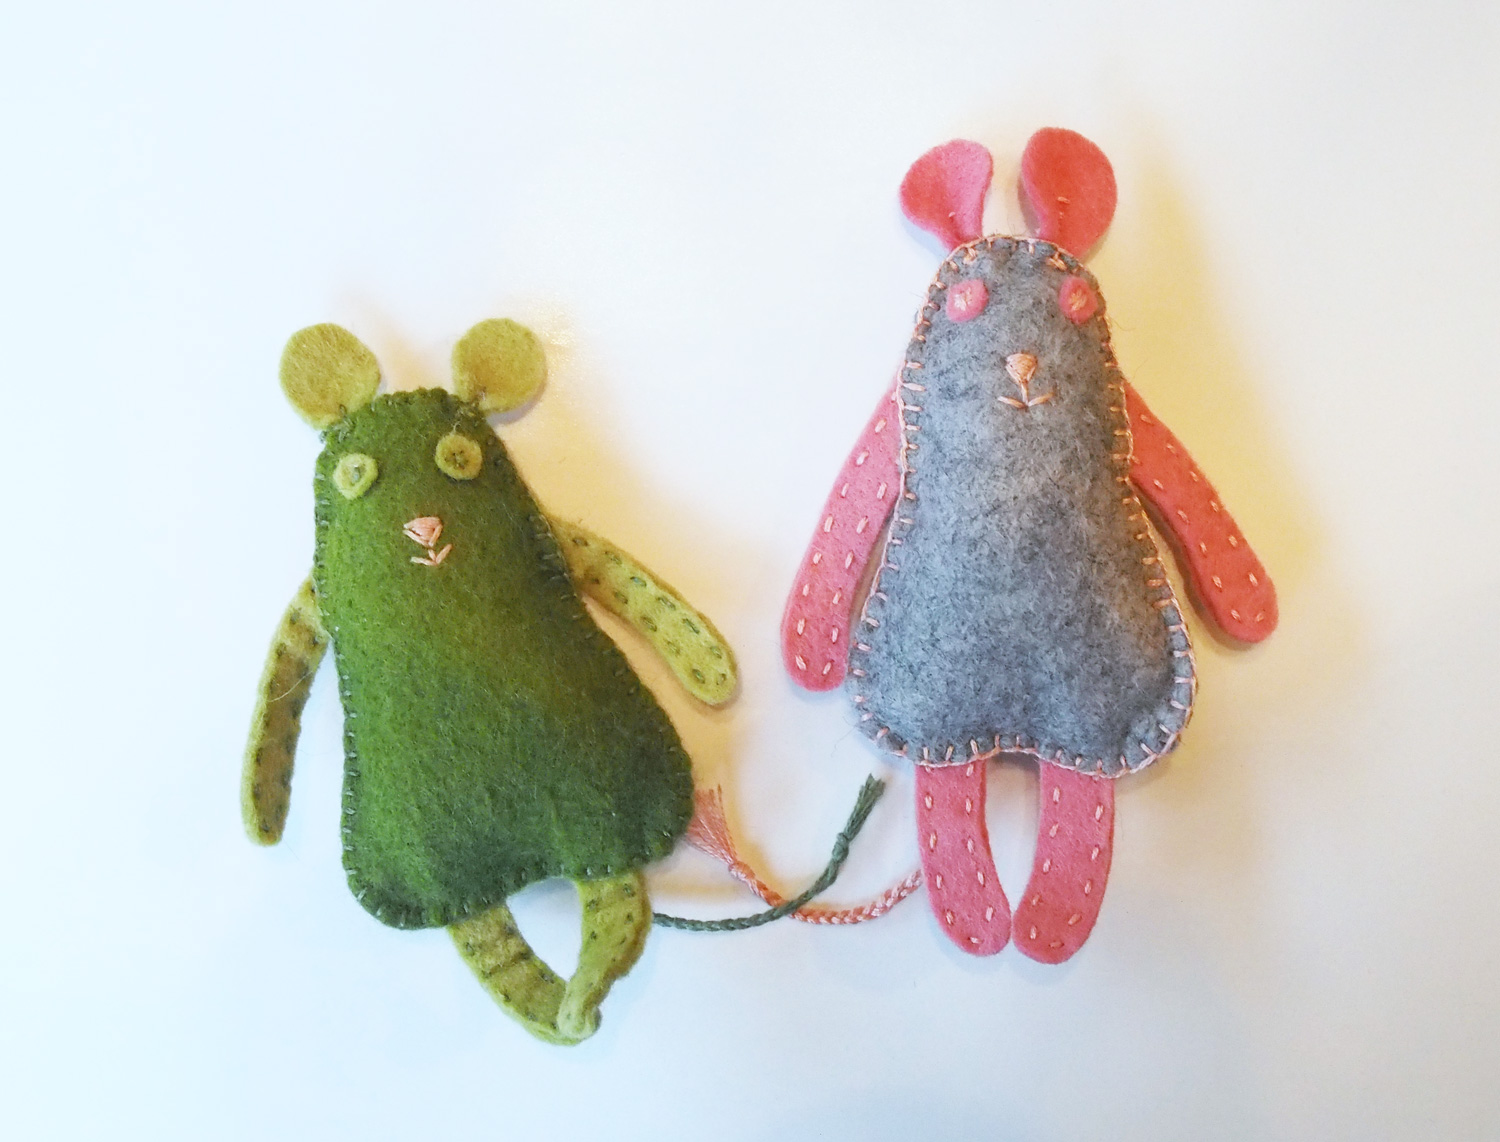
♥ look at these cute little mousie friends ♥
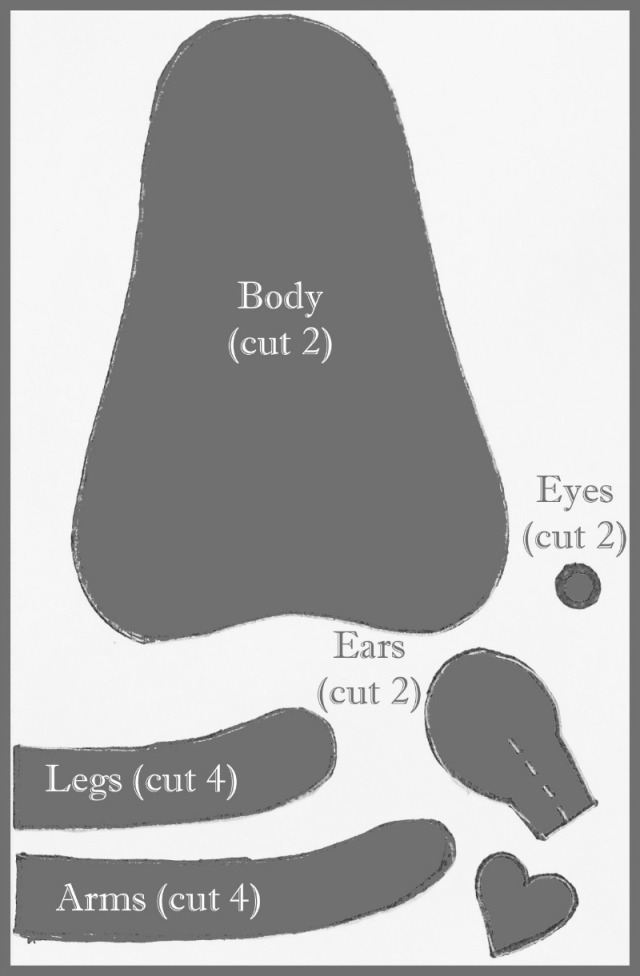
Click here – Mouse Pattern – or on the image above to download the pdf file of the pattern. Print it out on a piece of standard, 8.5″x11″ printer paper and cut out the template pieces.
This is my very first ‘tutorial’, so let me know what you think! Is there anything missing that would have made this project easier for you? Let me know so I can make my next one better.
If you make this, I would love to see it. Send me a photo so I can post is here. If you have any questions, please leave a comment or send me an email. I would love to hear from you!

Okay, first off, Mousie Tousie and Jim Marvin weren’t my “imaginary friends”. All of my imaginary friends were named after my older brother’s friends. Mousie Tousie and Jim Marvin were imaginary mice who lived (and I suppose still do) in the support column in the living room of my parents’ house. They had a daughter named “Dawn”. Their neighbors were two spiders named Africa Spider and Germany Spiders. They all had many adventures.
And secondly, the boys absolutely do love them. And at the risk of sounding like a softie, it made my heart smile to hear them making up new Mousie Tousie and Jim Marvin stories.


This is so cute. My grand daughter is coming over this after noon. She likes to sew, I have the stuff, so we will make this. A couple of weeks ago she made a tiny pillow. She is only 9 years old.
Thanks for stopping by and following me.
That’s so neat that your granddaughter likes to sew! I hope you guys have fun making this mouse together!!
xo ~ Stacey
Pingback: The Lady Thing The Most Adorable Valentine's Ideas for Your Kids - The Lady Thing
How did you stitch the blanket stitch around the arms, legs, etc.?
Ahhhh, good question! I forgot to mention this in the tutorial. I continued the blanket stitching right over the tops of the arms & legs, pretending as if they weren’t there. So, the stitches end up looking just like they would if you were just continuing to stitch around the edge of the body. To do this, you have to pass the needle straight *through* the limbs, right where they join the body. The thread still wraps around the edge of the body, it just has to do through the arms & legs to do it.
Hmmmm, that’s rather confusing when I try to say it in words. It’s really easy to do though! I will take a photo to illustrate and add it to the post. 🙂
I love your little mouse and you can use the real little eyes that move and it makes it more imaginable. You just glue them on. I’ll take a picture and send you. Thanks for the pattern, I had a terrible time finding one. People don’t want to share. Very good pictures and I love the story about your grandchildren. Also I put a scene on the inside lid to make it look like a bedroom.